Working with APIs
APIs are the primary way to connect your Nordcraft websites to external data sources. APIs enable communication between your front-end website and back-end services, allowing you to fetch, send and manipulate data.
Nordcraft supports any API and has a dedicated GraphQL explorer for working with GraphQL APIs.
For a quick primer on APIs including REST and GraphQL APIs, check out the following lesson from the Nordcraft Fundamentals video course.
Connect a new API
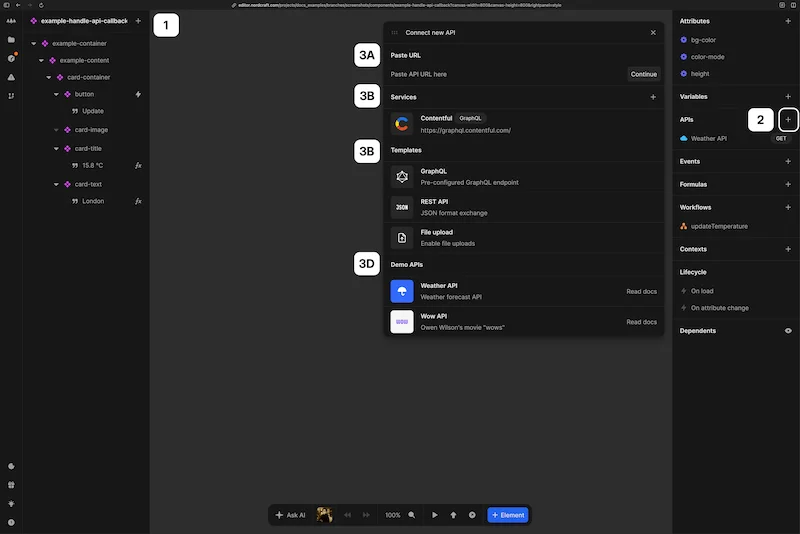
To create a new API connection in Nordcraft:
- 1Open the component or page where you want to add the API
- 2With no element selected, find the APIs section of the data panel and click the + button
- 3You will see the Connect new API panel with several options:
(A) Enter a URL directly to create a custom API
(B) Choose from connected services to access predefined endpoints (see Services)
(C) Select from available templates to set up common APIs
(D) Choose a Demo API
For beginners, Nordcraft comes with a collection of Demo APIs so you can explore the API panel and practise using API data in elements, components and the formula editor.
Configure API requests
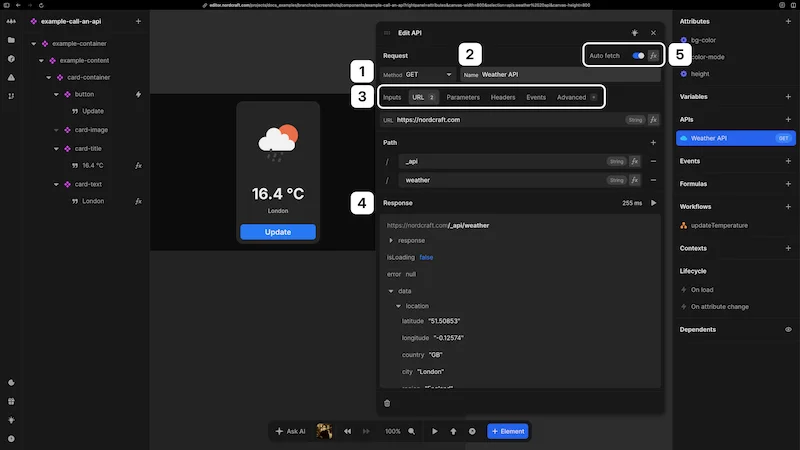
After connecting an API, you will see the configuration panel with the following sections:
- 1Method: Select the appropriate HTTP method (
GET,POST,PUT,DELETE, etc.) - 2Name: Give the API a descriptive name
- 3Configuration tabs:
- Inputs: Default values used when fetching data that can be overwritten when called from workflows
- URL: Configure the base URL and path
- Parameters: Configure query parameters
- Headers: Set request headers for authentication, content type, etc.
- Body: Define the request body for methods that support it (this tab is only visible for supported methods)
- Events: Define workflows for
On success,On errorandOn messageevents - Advanced: Access additional configuration options
- 4Response section: View the latest response from the server
- 5Auto fetch toggle: Control when the API automatically retrieves data
Configure the request URL
Configure the endpoint URL to specify where your request should be sent.
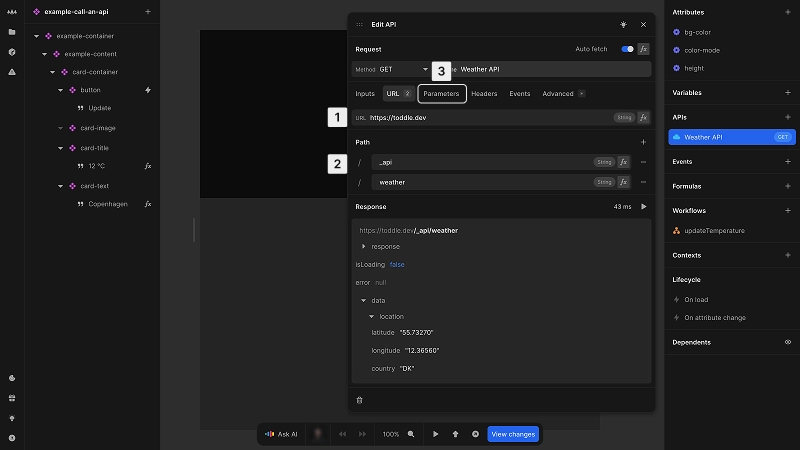
The URL and Parameters tabs allow you to construct the complete request URL by configuring:
- 1Base URL: the domain and protocol (e.g.
https://api.example.com) - 2Path: the specific endpoint path (e.g.
/users/profile) - 3Query parameters (in Parameters tab): key-value pairs that appear after
?in the URL- query parameters refine the response without changing the endpoint path
- parameters with
nullvalues are skipped
For a detailed explanation of URL structure, read our blog post about how URLs really work.
Set request headers
HTTP request headers provide additional information about the request that determine how the back-end server processes the API call.
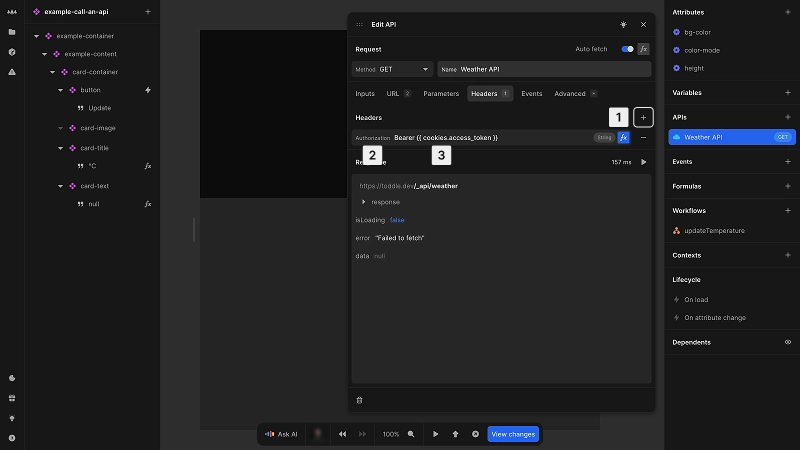
To add a request header:
- 1In the Headers tab, click the + button
- 2Select or enter the header name:
Content-Type: Format of the request body (e.g.application/json)Accept: Expected format of the response (e.g.application/json)Authorization: Authentication credentials (e.g.Bearer {{ cookies.access_token }})Cache-Control: Caching directives (e.g.no-cache)X-Api-Key: API key for authenticationAccept-Language: Preferred language for response- Type in any value and confirm with Enter for other headers
- 3Provide a static value or click fx for dynamic values
The documentation for your particular back-end API will provide information on what HTTP request headers it accepts for each URL endpoint.
Configure the request body
Define the data to send in the request body when the method supports it, such as POST, PUT, or PATCH.
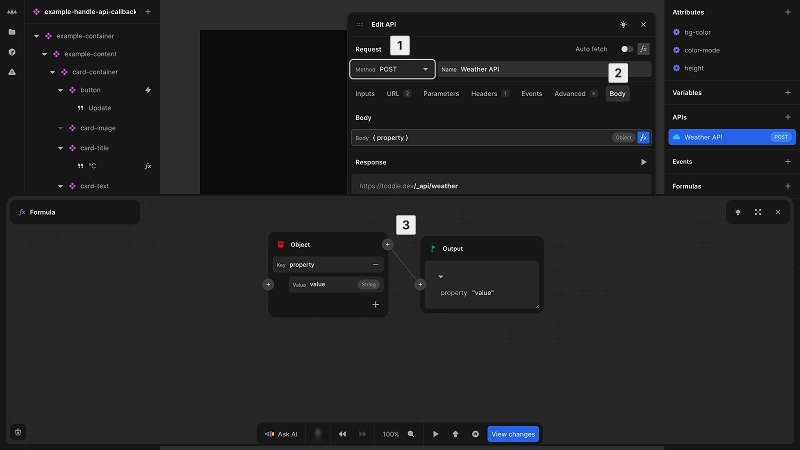
To configure the body:
- 1Ensure your method supports a request body
- 2Navigate to the Body tab
- 3Use the formula editor to define the data structure
By default, the request body will be encoded as JSON unless you specify a different format using the Content-Type header.
Auto fetch behavior
The auto fetch feature automatically triggers API requests based on certain conditions:
- When enabled, the API will fetch data when the component or page loads
- The API will automatically refetch when any formula values used in the request change
- This behavior can be controlled with a formula to create conditional fetching logic
Auto fetch is especially useful for HTTP GET requests where you want to display data immediately and keep it updated when related parameters change. Additionally, it enables server-side rendering (SSR) if configured in the Advanced tab.
Test API requests
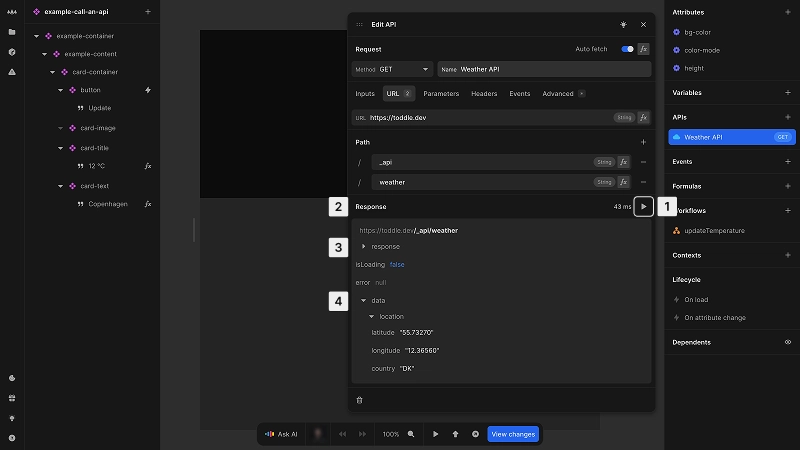
You can test your API directly in the editor:
- 1For APIs with
Auto fetchdisabled, click the Play button to manually trigger the request - 2View the response in the Response section at the bottom of the API panel
- 3Check the HTTP status code, response headers and body to ensure the API is working as expected
- 4Check the returned data to ensure the API provides the correct information
The response section will display the data returned from the API, including properly formatted JSON if that is the response format.
For a detailed tutorial on using REST APIs and using API data in the Nordcraft editor, check out the following lesson from the Nordcraft Fundamentals video course.
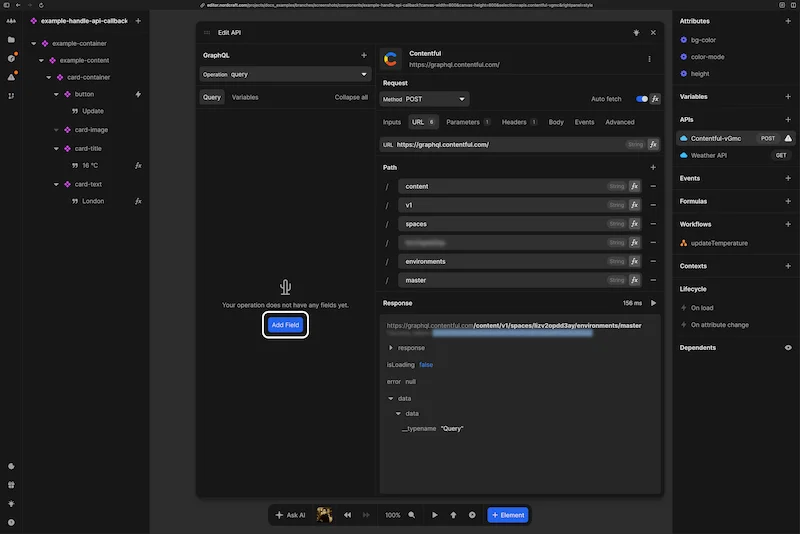
GraphQL explorer
Nordcraft provides a GraphQL explorer for you to build GraphQL queries for GraphQL APIs. After connecting a GraphQL API, click on the Add field button to start building your query.
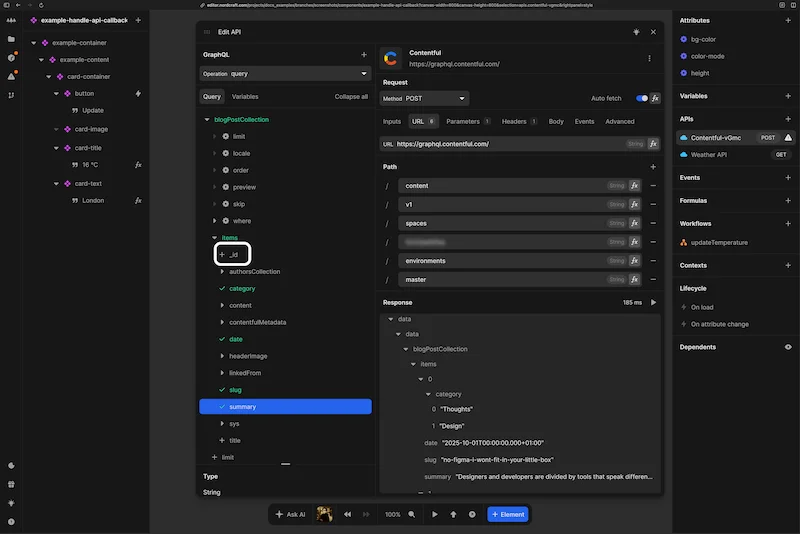
After you've added your first field, you'll see the GraphQL explorer open on the left of the API dialog so you can further refine your query. Click the + buttons to add fields to your query, and click the checkmarks next to the fields to remove them from your query. Watch the API response update in real time when the auto fetch toggle is on.
Add a GraphQL query variable
The GraphQL explorer supports GraphQL query variables, allowing you to build your queries with dynamic data.
To add a GraphQL query variable:
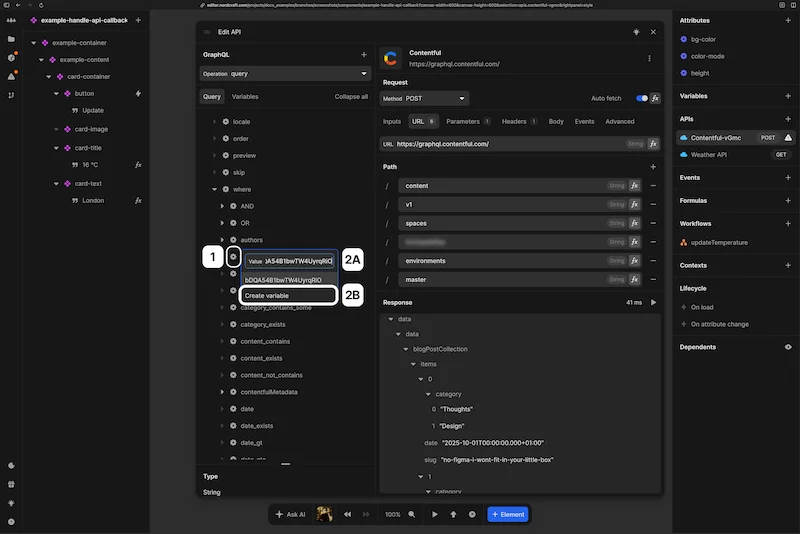
- 1Click on the cog wheel icon next to a field that supports a GraphQL variable
- 2Add a variable value in two ways:
(A) Paste in a hard-coded value
(B) ClickCreate variablefor more options and flexibility
When you create a GraphQL query variable, you can view and edit the variable in the variables tab of the GraphQL explorer. You can also use a formula to power the variable value using the formula editor.
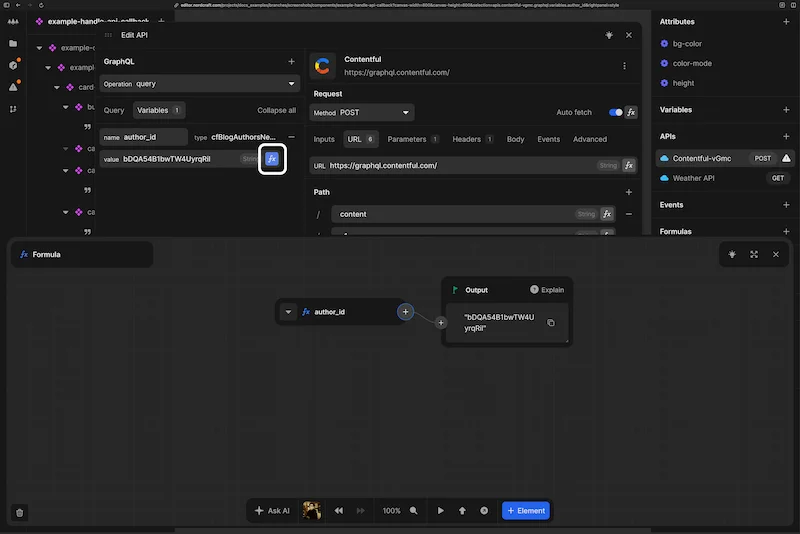
When you add a GraphQL query variable using Create variable, give it a descriptive name such as author_id.
For a detailed tutorial on using GraphQL APIs including using GraphQL variables, check out the following lesson from the Nordcraft Fundamentals video course.
Next steps
After setting up your API:
- Call the API in response to user actions
- Access API data in your components
- Configure authentication for secure data access
- Explore advanced features for specialized requirements