Create a new project in Nordcraft
Create a project from the dashboard
In the dashboard view, click the Create project button at the top right.

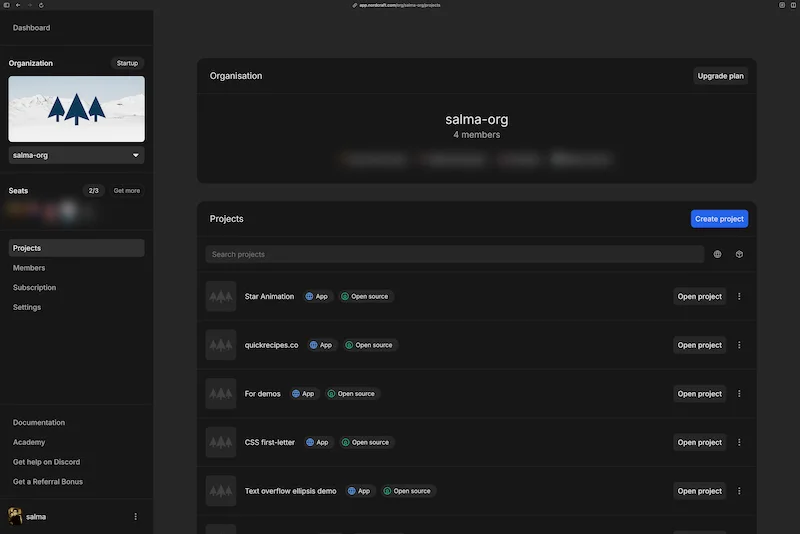
Create a project from the organization view
In the organization view, at the top right of the project list, find the button to create a project.
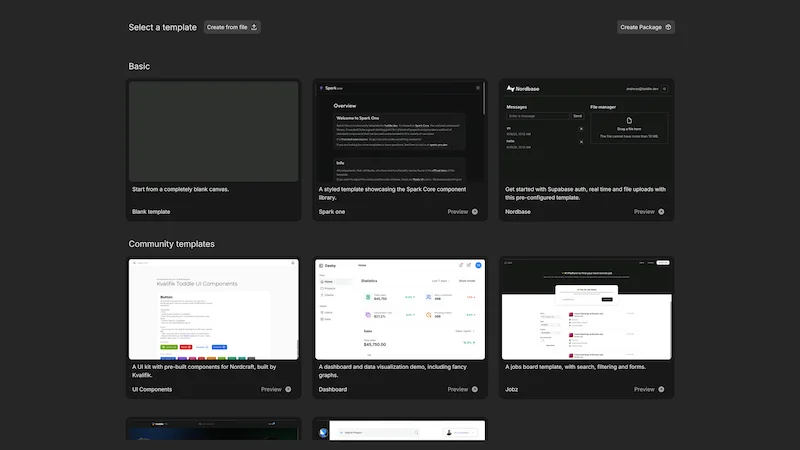
Create a website
First, pick a template to start from. Choose a basic blank template, a Nordcraft template, or a template built by the community.
Click on the template you wish to use and you'll see a dialog to configure the new project details.
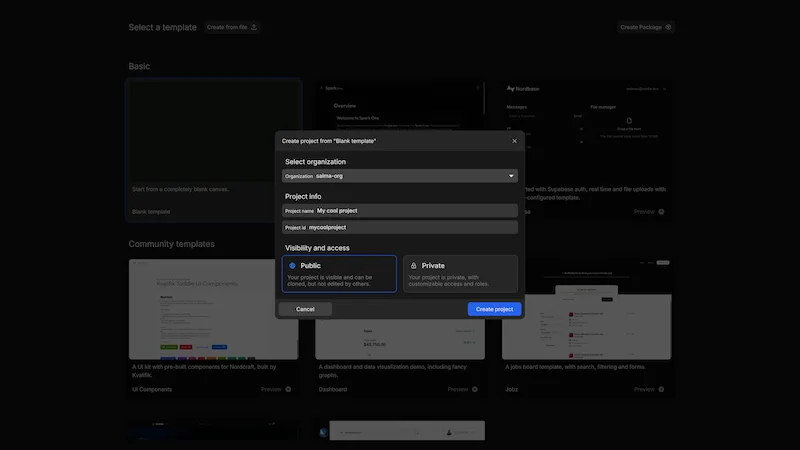
- 1Select organization: Pre-selected based on your account settings
- 2Project info:
- Add a project name
- The project ID is auto generated, you may wish to edit it before creating the project. It must only contain lowercase letters and numbers.
- 3Choose visibility: Decide who should be able to see your app; select public or private
Click Create project and the Nordcraft editor will open for you to start working.
Create a package
To create a package, click the Create package button at the top right of the template selection screen. This will open a dialog for you to configure your package details.
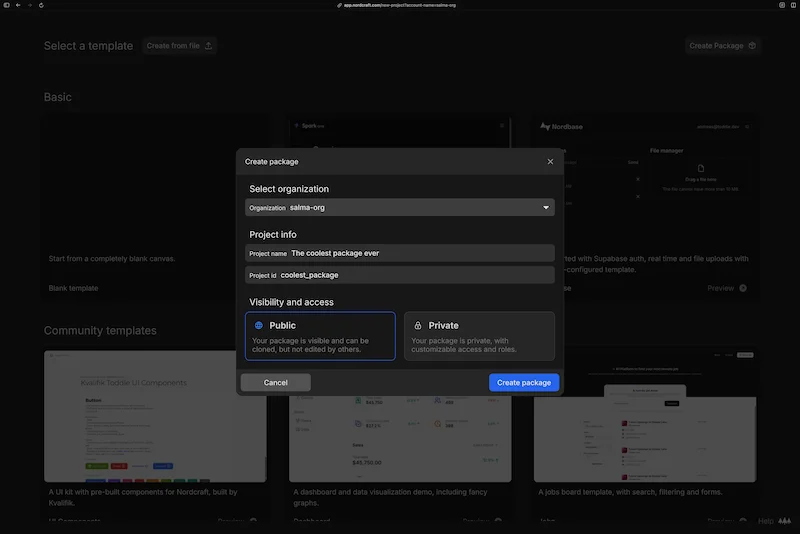
- 1Select organization: Pre-selected based on your account settings
- 2Project info:
- Add a project name
- The project ID is auto generated, you may wish to edit it before creating the project. It must only contain lowercase letters and numbers.
- 3Choose visibility: Decide who should be able to see your package; select public or private
Click Create package and the Nordcraft editor will open for you to start working.
For more detailed instructions on packages, see the creating and launching packages guide.
Visibility options
When creating a project you can choose between two visibility options:
- Public: Your project will be visible and clonable via a URL, but others cannot edit it
- Private: Your project is only visible within your organization, with customizable access and roles for different users